How to Take Professional Photos With Your Smartphone in 2026
A comprehensive guide to taking professional-quality photos with your smartphone in 2026. Covers camera modes, composition, lighting, pro mode, AI editing, night photography, and exporting for print and social media.
A
admin
April 4, 2026 · 11 min read
How-To Guide
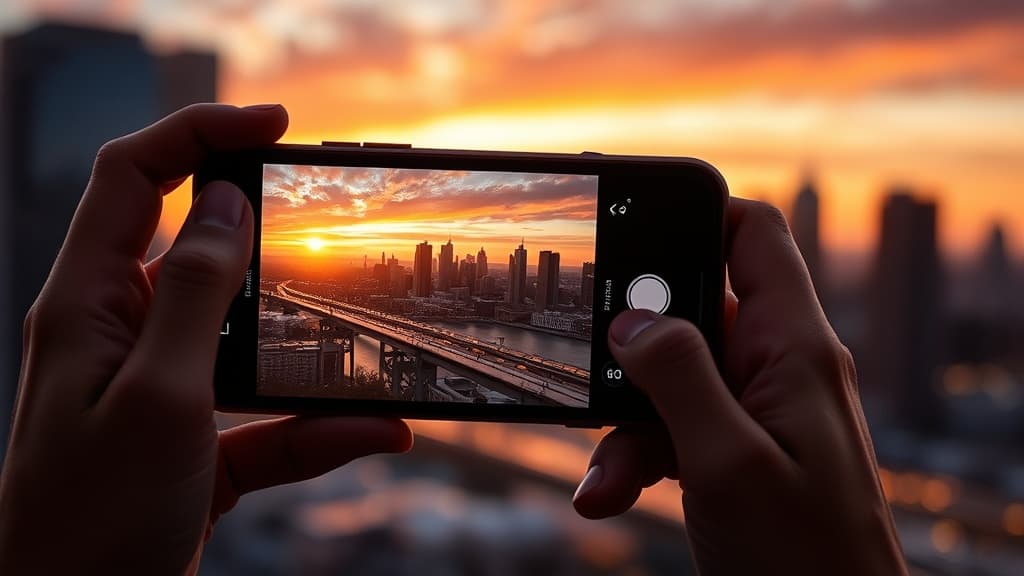
Your Phone's Camera Is Better Than You Think
The gap between smartphone cameras and dedicated cameras has narrowed to the point where, for most photographic situations, the phone in your pocket produces results that are genuinely professional. The flagship phones of 2026, the iPhone 17 Pro Max, Samsung Galaxy S26 Ultra, and Google Pixel 10 Pro, ship with camera systems that would have been science fiction a decade ago: one-inch-class sensors, periscope telephoto lenses with optical zoom beyond five times, dedicated AI processing engines for image quality, and computational photography pipelines that capture and merge multiple exposures in milliseconds.
But hardware is only half the equation. A fifty-thousand-dollar camera in untrained hands produces mediocre photos. A smartphone in the hands of someone who understands composition, lighting, and the specific capabilities of their device produces images that stop people mid-scroll. The difference is not the sensor size. It is the knowledge of the person pressing the shutter.
This guide covers everything you need to know to take professional-quality photographs with the phone you already own. No expensive accessories required. No need to switch to a dedicated camera. Just a deeper understanding of what your phone can do and the fundamental photographic principles that make any image compelling.
Understanding Your Camera System
The Multi-Lens Array
Modern smartphones ship with three or four rear cameras, each serving a specific purpose. Understanding what each lens does and when to use it is the first step toward intentional photography.
Main (Wide) Camera: This is your primary lens, typically a 24mm to 26mm equivalent focal length with the widest aperture (f/1.6 to f/1.9) and the largest sensor. It captures the most light and produces the highest-quality images. Use it as your default for most situations: landscapes, street photography, food, portraits at medium distance, and anything in moderate-to-low light.
Ultra-Wide Camera: Usually a 12mm to 16mm equivalent with a wider field of view that captures dramatically more of the scene. Use it for architecture, interiors, landscapes where you want to emphasize scale, and creative compositions where distortion adds visual interest. Quality is typically a step below the main camera due to a smaller sensor and narrower aperture.
Telephoto Camera: A 70mm to 120mm equivalent lens that brings distant subjects closer without digital cropping. Use it for portraits (telephoto compression flatters faces), wildlife, sports, and any scene where you want to isolate a subject from its background. Periscope designs in 2026 flagships offer three to five times optical zoom with high quality and up to ten times or more with a combination of optical and computational zoom.
Macro Camera (if present): Some phones include a dedicated macro lens for extreme close-ups of small objects. Others use the ultra-wide camera in a macro mode. Either way, macro photography reveals detail invisible to the naked eye and works beautifully for textures, insects, flowers, and product photography.
When to Switch Lenses
A common mistake is staying on the main camera for everything and using digital zoom when subjects are far away. Digital zoom beyond two times on the main camera degrades quality because it is simply cropping and enlarging the image. Instead, switch to the telephoto lens, which provides true optical magnification at its native focal length.
Conversely, do not use the ultra-wide lens when the main camera would produce a better image. Ultra-wide lenses distort straight lines at the edges of the frame and perform worse in low light. Use them deliberately when the wider perspective serves the composition, not as a default.
Composition: The Foundation of Every Good Photo
Technical quality means nothing if the image is not composed well. Composition is the arrangement of visual elements within the frame, and it is the single biggest factor that separates compelling photos from forgettable ones.
The Rule of Thirds
Enable the grid overlay in your camera settings (every phone offers this). The grid divides your frame into nine equal sections with two horizontal and two vertical lines. Place your subject on one of the four intersections where these lines meet rather than in the center of the frame. This creates a more dynamic, visually pleasing composition.
The rule of thirds is a starting point, not an absolute law. Centered compositions work well for symmetrical subjects, reflections, and portraits where eye contact with the viewer is the point. But when in doubt, placing your subject off-center produces stronger images.
Leading Lines
Lines within a scene, roads, fences, architectural edges, rivers, shadows, guide the viewer's eye toward your subject. Look for natural lines in your environment and position yourself so they lead toward the focal point of your image. A street receding into the distance, a row of columns converging at a building's entrance, or a winding path through a garden all create depth and direction.
Foreground Interest
Include an element in the foreground of landscape and environmental shots. A rock, a flower, a railing, or a textured surface in the bottom third of the frame adds depth and draws the viewer into the scene. Without foreground interest, landscapes often look flat and unengaging, no matter how beautiful the actual vista.
Simplify
The most common compositional mistake is including too much. Before pressing the shutter, ask yourself what the subject of this photo is, then remove everything that does not support it. Move closer. Change your angle. Wait for distracting elements to leave the frame. A clean, simple composition with one clear subject almost always outperforms a busy frame with multiple competing elements.
Perspective and Angle
Do not shoot everything from standing eye level. Crouch down to photograph pets, children, or ground-level details. Hold your phone overhead for a bird's-eye perspective of food or flat-lay arrangements. Tilt your phone to include dramatic diagonal lines. Small changes in height and angle create dramatically different images of the same subject.
Mastering Light
Light is the raw material of photography. The word photography literally means "writing with light." Understanding how to find, use, and shape light is what transforms snapshots into photographs.
Golden Hour
The period shortly after sunrise and before sunset produces warm, directional light that flatters virtually every subject. Shadows are long and soft. Colors are saturated. Skin tones glow. If you can schedule your photo session for golden hour, do it. The difference between golden hour light and midday light is the difference between a professional-looking image and a harsh, unflattering one.
To find golden hour times for your location, search "golden hour" plus your city name, or use an app like Sun Surveyor or Golden Hour One.
Overcast Days Are Your Friend
Cloud cover acts as a giant diffuser, softening shadows and producing even, flattering light across your entire subject. Overcast days are ideal for portraits, product photography, and any situation where harsh shadows would be distracting. Professional photographers sometimes prefer overcast conditions to direct sunlight because the light is easier to work with and more consistent.
Window Light for Indoor Photography
Natural window light is the most flattering and accessible light source for indoor photography. Position your subject near a window with indirect light (not direct sun streaming through). The light falls off gradually across the subject, creating gentle shadows that add dimension without harshness.
For portraits, position the subject so the window light hits them from a forty-five-degree angle. This creates the classic portrait lighting pattern with one side of the face brighter than the other, adding depth and visual interest.
Avoid Harsh Midday Sun
Direct overhead sun creates deep shadows under eyes, noses, and chins in portraits, and produces extreme contrast in landscapes. If you must shoot in midday sun, look for open shade, a shaded area near a bright, sunlit surface. The sunlit surface bounces soft, reflected light into the shaded area, providing even illumination without harsh shadows.
Backlighting
Positioning your subject between the camera and the light source creates backlit images. When done intentionally, backlighting produces beautiful rim light around your subject's outline, glowing hair, and a sense of atmosphere. Use your phone's exposure compensation (tap the screen on your subject and slide the brightness slider up) to prevent the subject from becoming a silhouette.
Using Pro Mode (Manual Camera Controls)
Every flagship phone offers a pro or manual mode that gives you direct control over exposure settings. Learning to use these controls elevates your photography beyond what automatic mode can achieve.
ISO
ISO controls the sensor's light sensitivity. Lower ISO values (50 to 200) produce clean images with minimal noise. Higher values (800 to 3200+) brighten the image but introduce grain. Use the lowest ISO possible and only increase it when necessary in low-light situations. In daylight, keep ISO at 50 or 100.
Shutter Speed
Shutter speed determines how long the sensor is exposed to light. Fast shutter speeds (1/500 to 1/2000 second) freeze motion, perfect for sports, kids, and pets. Slow shutter speeds (1/15 to several seconds) create motion blur, useful for waterfalls, light trails, and intentional artistic blur. For handheld shooting, keep shutter speed at or above 1/60 second to avoid camera shake.
White Balance
White balance adjusts color temperature so whites look white under different lighting conditions. Auto white balance works well most of the time, but manual control lets you correct for tricky lighting or create intentional color casts. Warmer settings (higher Kelvin values around 5500-6500K) add a golden tone. Cooler settings (lower values around 3500-4500K) add a blue cast. Use warmer white balance for golden hour shots and cooler settings for shade or overcast conditions.
Focus and Exposure Lock
Tap on your subject in pro mode to set focus. Long-press to lock focus and exposure at that point, then recompose your shot without the camera readjusting. This is essential for scenarios where the camera's autofocus might hunt between subjects or where you want to maintain a specific exposure while changing the framing.
RAW Capture
Pro mode typically offers RAW file capture (DNG format). RAW files retain all the data captured by the sensor without the compression and processing applied to JPEG files. They look flat and dull straight out of the camera, but they contain vastly more information for editing. If you plan to edit your photos seriously, shoot in RAW. If you want quick, ready-to-share images, JPEG with computational processing is fine.
Night Mode and Low-Light Photography
Smartphone night photography has advanced dramatically thanks to computational photography. Night mode captures multiple frames at different exposures and merges them using AI to produce bright, detailed images in conditions where the human eye can barely see.
How Night Mode Works
When you activate night mode (or when the camera activates it automatically in low light), the phone captures a burst of frames over several seconds. Some frames are short exposures that preserve highlights and freeze slight motion. Others are longer exposures that gather more light from dark areas. The phone's neural processing engine aligns these frames, removes blur, reduces noise, and composites them into a single image with dynamic range that exceeds what any single exposure could capture.
Tips for Better Night Shots
Hold still. Night mode exposures last two to five seconds. Even small movements during this time reduce sharpness. Brace your elbows against your body, lean against a wall, or rest the phone on a solid surface. A mini tripod or phone clamp produces the sharpest results.
Look for light sources. Night photography works best when there are light sources in the scene: street lamps, neon signs, candles, the moon. Pure darkness produces flat, noisy images regardless of computational processing. The interplay between light and shadow is what makes night images compelling.
Avoid the flash. The phone's LED flash produces harsh, flat light with no directionality. It illuminates nearby subjects while leaving backgrounds pitch black. Night mode's computational approach produces far superior results in almost every situation. Keep the flash off.
Try long exposure mode. Some phones offer a dedicated long exposure or light trail mode that captures smooth light streaks from moving cars, flowing water, or spinning lights. This requires a tripod or stable surface but produces stunning results.
AI Editing: Enhancing Without Overdoing
Every smartphone photo undergoes AI processing before you even see it. But post-capture editing, done thoughtfully, can take a good image to an excellent one. The key word is thoughtfully. Over-edited photos with cranked saturation, excessive sharpening, and artificial HDR look worse than unedited images.
Built-In Editing Tools
Your phone's native photo app includes powerful editing tools. Start here before reaching for third-party apps.
Crop and straighten: Fix tilted horizons and remove distracting elements at the edges. A slight crop can dramatically improve a composition you did not quite nail in camera.
Exposure and brightness: Brighten underexposed images or recover an overexposed shot. Adjust in small increments, five to ten percent at a time.
Contrast: A slight increase in contrast (ten to twenty percent) adds punch to flat images. Too much makes shadows impenetrable and highlights blown.
Highlights and shadows: These controls independently adjust the bright and dark areas of the image. Reducing highlights recovers detail in bright skies. Lifting shadows reveals detail in dark areas. Use both to create balanced, detailed images.
Warmth and tint: Fine-tune color temperature and green-magenta balance. A slight warm shift (five to ten percent) makes most images more inviting.
Third-Party Editing Apps
Lightroom Mobile (free with optional subscription): The gold standard for mobile photo editing. Non-destructive editing, excellent RAW processing, selective adjustments that let you edit specific areas of the image, and preset support for consistent editing across your photos.
Snapseed (free): Google's editing app offers powerful tools in a simple interface. The selective tool lets you adjust brightness, contrast, and saturation in specific areas by tapping on them. The healing tool removes unwanted objects.
VSCO (free with premium option): Known for film-inspired presets that produce natural, editorial looks. Less technical than Lightroom but produces beautiful results quickly.
The Less-Is-More Rule
Professional photo editing is subtle. If someone can tell a photo has been edited, it has been edited too much. Here is a general guideline: adjust any individual parameter by no more than twenty to thirty percent. If an image needs more correction than that, the issue is usually with the original capture (bad lighting, wrong exposure, poor composition) and editing cannot save it.
The trend in 2026 is toward computational realism, using processing power to preserve what is real rather than constructing something artificial. The best smartphone photographers are the ones whose photos look natural, detailed, and well-lit, not the ones whose photos look like they were run through a filter factory.
Exporting and Sharing: Getting the Quality Right
Resolution and Format for Social Media
Instagram compresses uploaded images significantly. To minimize quality loss, export at the platform's optimal resolution: 1080 pixels wide for feed posts, 1080 by 1920 pixels for stories and reels. Exporting at higher resolutions does not improve quality because the platform will compress the image to its own specifications regardless.
For Twitter and Threads, export as PNG rather than JPEG if the platform supports it. PNG files are not lossy-compressed, so the image retains more detail after the platform applies its own compression.
Exporting for Print
If you plan to print your smartphone photos (and they are absolutely good enough to print in 2026), export at the maximum resolution available. A 48-megapixel or 200-megapixel sensor produces files large enough for wall-sized prints. Export in TIFF or maximum-quality JPEG. Ensure your editing app is not downscaling the image during export.
For standard print sizes, you need approximately 300 pixels per inch (PPI). A 12-megapixel image (4032 by 3024 pixels) prints at excellent quality up to roughly 13 by 10 inches. Higher-megapixel sensors allow proportionally larger prints.
Preserving EXIF Data
EXIF data includes the camera settings, GPS location, date, and time associated with each photo. This information is useful for organizing your library and remembering where and when photos were taken. However, EXIF data also includes location information that you may not want to share publicly. Most social media platforms strip EXIF data on upload, but if you are sharing photos through messaging apps or email, consider removing location data first through your phone's sharing settings.
Backing Up Your Photo Library
Your best photos deserve reliable backup. Enable automatic cloud backup through Google Photos, iCloud Photos, or your preferred service. Keep the original, unedited files alongside your edited versions. Storage is cheap; losing irreplaceable photos is not.
For photos you are genuinely proud of, consider exporting and storing the RAW files separately. Cloud storage services like Google One and iCloud Plus offer affordable plans with multiple terabytes of storage. A decade from now, you will be grateful for the RAW files that let you re-edit old favorites with future software.
Building a Consistent Style
The photographers whose work you admire most likely have a consistent visual style, a recognizable approach to color, composition, and subject matter that makes their images identifiable even without a watermark. Developing your own style takes time and intentional practice.
Shoot the same subject in different light and from different angles. Edit a batch of photos from the same session using the same approach and evaluate whether they look cohesive. Save editing presets that produce results you consistently like and apply them as starting points for future edits.
Study the work of photographers you admire. Not to copy their style, but to understand the choices they make. Why did they compose this way? Where was the light coming from? How do their colors feel? Observation is the fastest path to improvement.
And above all, shoot frequently. The best camera is the one you have with you, and in 2026, that camera happens to be one of the most capable photographic tools ever built. The only thing standing between you and professional-quality images is practice, observation, and the willingness to shoot deliberately rather than reflexively.
Was this article helpful?
Join the conversation — sign in to leave a comment and engage with other readers.
Loading comments...
Related Posts
cameras
Best Point and Shoot Film Cameras in 2026: The Analog Photography Guide
Apr 4, 2026gaming
How to Build a Gaming PC in 2026: Complete Parts Guide and Assembly
Apr 4, 2026cybersecurity
How to Protect Yourself From AI-Powered Phishing Attacks in 2026
Apr 4, 2026smart-home
How to Set Up a Matter Smart Home in 2026: Complete Beginner's Guide
Apr 4, 2026Enjoyed this article?
Get the best tech reviews, deals, and deep dives delivered to your inbox every week.