How to Set Up Home Assistant in 2026: Complete Guide for Raspberry Pi, HA Green & Yellow
A thorough, step-by-step guide to installing and configuring Home Assistant in 2026. Covers hardware selection, HAOS installation, device onboarding, automations, and dashboard customization.
A
admin
April 20, 2026 · 11 min read
How-To Guide
Why Home Assistant Is the Smart Home Platform to Beat in 2026
The smart home landscape has never been more exciting — or more fragmented. Matter has standardized device communication, but the controller you choose still dictates how much power and flexibility you actually have. Cloud-dependent platforms like Google Home and Amazon Alexa are convenient, but they limit what you can automate and expose your data to third-party servers.
Home Assistant, now running version 2026.4.3, takes a fundamentally different approach. It runs locally on your own hardware, processes every automation on your own network, and integrates with over three thousand devices and services — from Zigbee bulbs and Z-Wave locks to Spotify, Tesla, and your local weather station. Nothing leaves your house unless you choose to let it.
In 2026, Home Assistant has never been easier to get started with. The official hardware lineup — HA Green and HA Yellow — eliminates the complexity of self-managed Linux boxes for newcomers, while the Raspberry Pi 5 remains the go-to for tinkerers who want maximum control. This guide walks through every path, from unboxing to your first working automation.
Prerequisites
Before you start, gather the following:
- A compatible device to run Home Assistant (see Step 1 for options)
- A wired Ethernet connection during initial setup (strongly recommended over Wi-Fi)
- A modern smartphone or laptop for configuration via the web browser
- Smart home devices you want to control (the guide covers onboarding in Step 4)
- About 30–60 minutes of hands-on time
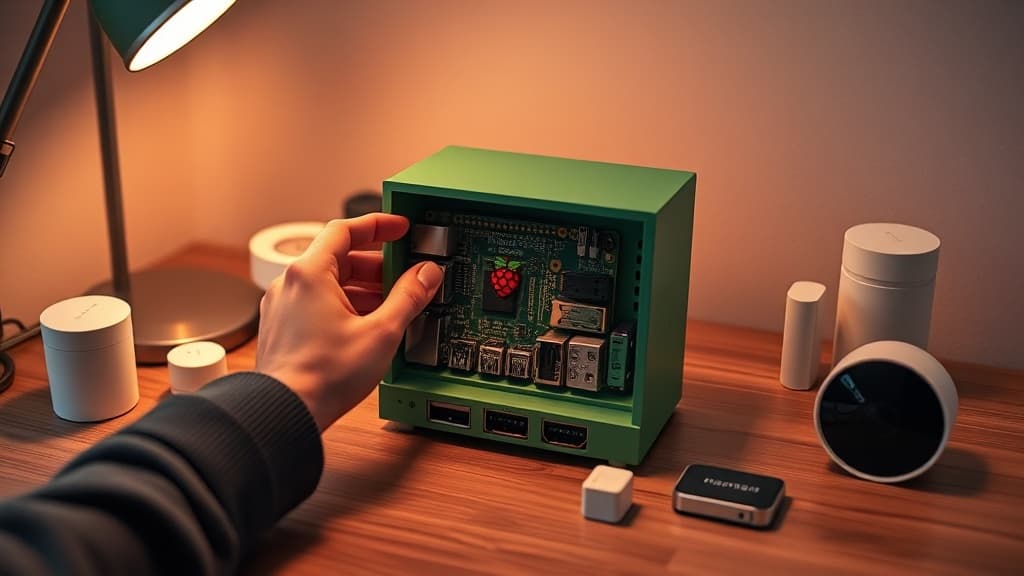
Step 1: Choose Your Hardware
Home Assistant runs on several platforms. Your choice determines how much time you spend on setup versus how much flexibility you get later.
Option A: Home Assistant Green (Easiest)
The Home Assistant Green is purpose-built hardware from Nabu Casa, the company behind Home Assistant. It ships with Home Assistant OS pre-installed, plugs in via Ethernet and power, and is ready to configure in under five minutes. The Green runs a 1.8 GHz quad-core CPU with 4 GB of RAM and 32 GB of eMMC storage — more than enough for hundreds of devices and complex automations.
The Green has no built-in wireless radio, so you will need a USB dongle like the Home Assistant SkyConnect for Zigbee and Thread devices. This is a minor inconvenience but keeps the hardware price low at around $99.
Buy Home Assistant Green on Amazon
Option B: Home Assistant Yellow (Most Integrated)
The HA Yellow includes a built-in Zigbee and Thread radio, plus an M.2 NVMe slot so you can install a fast SSD instead of relying on the slower eMMC. It requires a Raspberry Pi Compute Module 4 (CM4) as its brain, which you purchase separately. The combination gives you the best balance of speed, reliability, and radio hardware in the official lineup.
Note that Yellow is now sold as a kit only — you provide the CM4. A CM4 with 4 GB of RAM costs around $55 from most suppliers.
Buy Raspberry Pi CM4 4GB on Amazon
Option C: Raspberry Pi 5 (Most Flexible)
The Raspberry Pi 5 with 4 GB or 8 GB of RAM is the community favorite for a reason: it is fast, well-supported, and gives you complete control over storage and peripherals. Pair it with a USB SSD or an NVMe HAT for reliable storage — microSD cards are not recommended for production Home Assistant installs due to wear-induced failures.
Buy Raspberry Pi 5 8GB on Amazon
Buy Samsung T7 USB SSD on Amazon
Option D: Existing x86 PC or Mini PC
If you have an old Intel NUC, a spare laptop, or a mini PC like the Beelink Mini S12, you can run Home Assistant OS on it as a dedicated appliance. This gives you the most processing headroom and is ideal if you plan to run many add-ons or VMs inside Home Assistant.
Step 2: Install Home Assistant OS (HAOS)
For HA Green, skip to Step 3 — it arrives pre-installed. For all other hardware, follow these steps.
Download the Correct Image
Go to home-assistant.io/installation and select your hardware. For Raspberry Pi 5, choose the 64-bit HAOS image. For x86/x64 hardware, choose the generic x86-64 image. Download the .img.xz file.
Flash the Image
Download and install the Raspberry Pi Imager from raspberrypi.com/software. It works on Windows, macOS, and Linux.
- Open Raspberry Pi Imager.
- Click Choose OS → scroll to the bottom → Use custom → select your downloaded HAOS
.img.xzfile. - Click Choose Storage → select your SSD or SD card.
- Click Write and confirm. This will erase the target device.
For x86 hardware, write the image to a USB drive using the same process, boot from that USB drive, and HAOS will install itself to the target drive.
First Boot
Insert the flashed storage into your Pi or device, connect Ethernet, and power on. The first boot takes 5–10 minutes as HAOS downloads the latest version of Home Assistant Core and sets up the supervisor. Do not power off during this process.
Step 3: Complete the Onboarding Wizard
Once HAOS is running, you access it from a browser on the same network.
Access the Web Interface
Open a browser and go to http://homeassistant.local:8123. If that does not resolve, find your router's DHCP client list and look for a device named homeassistant to get the IP address directly. Bookmark this IP — you will use it daily.
Create Your Account
The onboarding wizard walks you through:
- Create account — set your username and a strong password. This is your admin account.
- Name your home — used for presence detection and location-based automations.
- Set location — Home Assistant uses this for sunrise/sunset times and weather data.
- Select unit system and time zone — choose carefully; changing these later requires updating all automations.
- Privacy settings — choose whether to share anonymous usage data with the Home Assistant project.
Install the Mobile App
Download the Home Assistant companion app for iOS or Android. Log in using your server's address and credentials. The mobile app enables:
- Push notifications from automations
- Device tracking (presence detection)
- Exposing phone sensors (battery, location, WiFi SSID) to Home Assistant
Step 4: Add Your First Devices
Home Assistant discovers many devices automatically. Go to Settings → Devices & Services to see what it has already found on your network.
Integrations Auto-Discovery
Home Assistant scans your local network for compatible devices. Philips Hue bridges, Sonos speakers, Chromecast devices, and many others appear in the Discovered section ready to configure with a single click. Select each discovered integration and follow the authorization flow.
Adding Zigbee Devices (ZHA or Z2M)
For Zigbee devices — the most common protocol for smart bulbs, sensors, and plugs — you need a Zigbee USB dongle. The Home Assistant SkyConnect works with both Zigbee and Thread.
Two Zigbee stacks are available as add-ons:
- Zigbee Home Automation (ZHA) — built into Home Assistant, easiest to set up, handles 95% of use cases
- Zigbee2MQTT (Z2M) — more advanced, broader device support, requires the Mosquitto MQTT broker add-on
For beginners, start with ZHA. Go to Settings → Devices & Services → Add Integration → Zigbee Home Automation, select your dongle, and the radio will initialize. Put your Zigbee device in pairing mode (usually by holding a button or power-cycling three times rapidly) and it will appear in Home Assistant within 30 seconds.
Adding Matter Devices
Home Assistant supports Matter natively since version 2022.12 and has matured significantly. Go to Settings → Devices & Services → Add Integration → Matter and follow the prompts. Scan the QR code on the device with your phone, and Home Assistant will commission it onto your network.
Adding Wi-Fi Smart Plugs and Bulbs
Brands like TP-Link Tapo, Tuya, and Shelly have official Home Assistant integrations. Search the integrations list for your brand name and follow the authentication steps. Shelly devices, in particular, integrate over the local network without any cloud dependency — a major advantage for reliability and privacy.
Buy Shelly Plus 1 Smart Switch on Amazon
Step 5: Create Automations
Automations are the core of Home Assistant's value. The built-in Automation editor lets you build rules visually, and advanced users can drop into YAML for full control.
Understanding Triggers, Conditions, and Actions
Every automation has three parts:
- Trigger: What starts the automation (a time, a sensor state, a device event)
- Condition (optional): Rules that must be true for the automation to proceed
- Action: What happens when the automation runs
Your First Automation: Motion-Activated Lights
- Go to Settings → Automations & Scenes → Create Automation.
- Click Add Trigger → Device → select your motion sensor → Motion detected.
- (Optional) Click Add Condition → Time → set the active hours (e.g., sunset to midnight).
- Click Add Action → Device → select your light → Turn on.
- Add a second action to turn the light off after a delay: Call service → timer.start, or use a Wait block followed by a Turn off action.
- Name your automation and save.
Using Blueprints
Blueprints are pre-built automation templates contributed by the community. Go to Settings → Automations & Scenes → Blueprints and browse the blueprint exchange. Popular blueprints include motion-activated lighting with adjustable delays, presence-based climate control, and low battery notification systems. Import a blueprint URL and fill in the variables for your specific devices — no YAML required.
Scene Configuration
Scenes capture the state of multiple devices at once. Create a Movie Night scene that dims the living room to 20%, turns off the hallway light, and sets the thermostat to 70°F. Activate it with a voice command, a dashboard button, or an automation trigger.
Step 6: Build Your Dashboard
The Home Assistant dashboard (Lovelace) is your day-to-day control panel. The default auto-generated dashboard is functional, but a customized one is far more useful.
Editing the Dashboard
- Click the pencil icon in the top right of any dashboard view.
- Click Add Card to choose from dozens of card types.
- Entities card — shows multiple devices in a list. Good for a room overview.
- Thermostat card — shows and controls your climate devices.
- History graph card — visualizes sensor data over time.
- Light card — controls brightness and color temperature with sliders.
- Button card — triggers scripts, scenes, or automations with a tap.
Organizing by Rooms
Create separate dashboard views for each room or area of your home. Use the Area feature in Settings → Areas & Zones to assign devices to rooms. The Room card type automatically groups all devices in an area into a clean card layout.
Installing HACS (Home Assistant Community Store)
HACS is an unofficial store for community-built integrations, dashboard cards, and themes. It dramatically expands what Home Assistant can do. Install it by following the instructions at hacs.xyz — the process involves running a terminal command in the HA SSH add-on and restarting. Once installed, you gain access to thousands of extra integrations and dozens of beautiful dashboard themes.
Troubleshooting Common Issues
Home Assistant Is Not Accessible at homeassistant.local
This usually means mDNS is blocked on your network. Try the direct IP address instead. Check your router's DHCP list for the homeassistant hostname to find the IP. Some corporate-style routers block mDNS by default.
Zigbee Devices Are Not Pairing
Ensure the USB dongle is not in a USB 3.0 port — USB 3.0 interference is a known issue with 2.4 GHz radios. Use a short USB 2.0 extension cable to position the dongle away from the Pi or NUC. Factory reset the device and try pairing again from within 3 meters of the dongle.
Automations Not Triggering
Check the Logbook (in History) to see if the trigger event is being recorded. If the trigger fires but the automation does not run, check your conditions — a common mistake is setting a time condition that does not cover the current time. Enable the automation's Trace feature to see exactly which step it stopped at.
System Is Slow After Adding Many Devices
Increase the polling interval for cloud integrations that are queried frequently. Check Settings → System → Hardware for CPU and memory usage. If you are regularly above 80% RAM usage, it is time to migrate to more powerful hardware. An NVMe SSD will also dramatically improve database write performance if you are using a microSD card.
Database Growing Too Large
Home Assistant records state history in a local SQLite database by default. Over time this can grow to several gigabytes. Go to Settings → System → Storage to review size. Configure the recorder integration in your configuration.yaml to exclude high-frequency entities (like energy monitors that update every second) from history:
recorder:
  purge_keep_days: 30
  exclude:
    entity_globs:
      - sensor.energy_*
Safety and Security Notes
- Change the default port if you expose Home Assistant to the internet. Better yet, use a VPN (WireGuard via the official add-on) or Nabu Casa's cloud tunnel instead of direct port forwarding.
- Enable two-factor authentication under your profile settings.
- Keep HAOS updated — monthly updates include security patches. Go to Settings → System → Updates and enable automatic minor updates.
- Back up regularly — use the built-in backup feature under Settings → System → Backups and download a copy to an external drive after major configuration changes.
Home Assistant in 2026 strikes a balance that was difficult to achieve even two years ago: genuinely accessible for beginners while remaining infinitely extensible for power users. Once your first automation saves you from walking to a light switch at midnight, you will understand why the community is so devoted to it.
Was this article helpful?
Join the conversation — sign in to leave a comment and engage with other readers.
Loading comments...
Related Posts
smart-home
How to Build a Smart Home on a Budget in 2026: Complete Step-by-Step Guide
Apr 13, 2026smart-home
How to Set Up a Matter Smart Home in 2026: Complete Beginner's Guide
Apr 4, 2026smart-home
How to Build a Self-Hosted NAS in 2026: TrueNAS vs Unraid, Hardware Picks, and Backup Strategy
Apr 20, 2026smart-home
Sonos Arc Ultra vs Bose Smart Ultra Soundbar: Which Wins in 2026?
Apr 20, 2026Enjoyed this article?
Get the best tech reviews, deals, and deep dives delivered to your inbox every week.